



Custom Swimming Pool Planning: A Step-by-Step Guide for Homeowners
Planning a residential swimming pool requires more than choosing an attractive design. Homeowners need to consider available space, construction costs, intended use, safety requirements, equipment, and long-term maintenance before beginning the project. A structured planning process helps prevent expensive mistakes and ensures that the finished pool meets practical household needs.
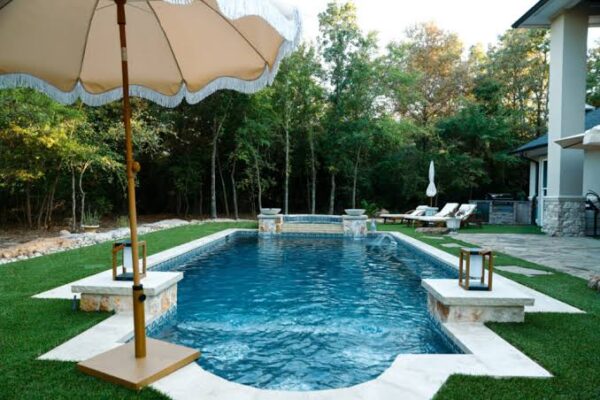
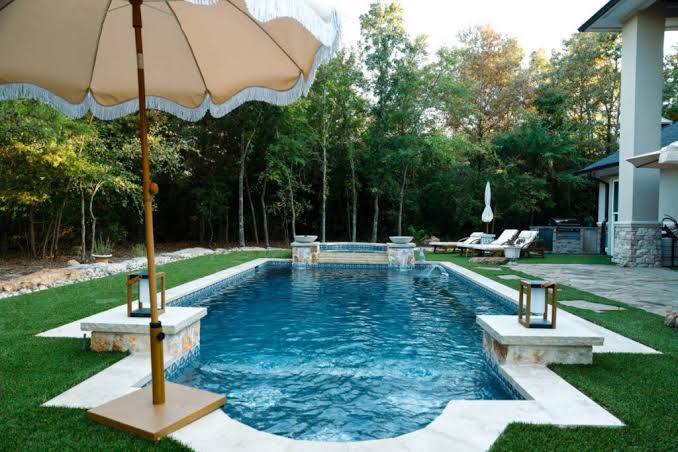
A well-designed Custom Swimming Pool can complement a property’s architecture while providing space for relaxation, exercise, and family recreation. By approaching each stage methodically, homeowners can make informed decisions and create a pool that suits their lifestyle, property conditions, and budget.
Step 1: Define Your Swimming Pool Goals
Begin by identifying why you want a swimming pool and how you expect to use it. Your priorities will influence nearly every design decision, including the pool’s dimensions, depth, shape, and additional features.
For example, a family seeking a recreational space may prioritize comfortable entry points and areas for supervised water activities. Homeowners interested in fitness may prefer a longer swimming lane, while those focused on relaxation might choose a compact pool with built-in seating.
Consider these questions before moving forward:
- Will the pool primarily support exercise, recreation, or relaxation?
- How many people are likely to use it regularly?
- Will children, older adults, or people with mobility limitations use the pool?
- Do you need features such as heating, lighting, or automated controls?
- How much time can you dedicate to cleaning and maintenance?
Clear priorities make it easier to distinguish essential features from optional additions.
Step 2: Evaluate Your Property
The next step is to determine where the pool can be installed and how it will fit into the existing outdoor environment. Measure the available area and consider property boundaries, nearby buildings, trees, underground utilities, and access routes.
The usable space must accommodate more than the water itself. Surrounding walkways, safety barriers, equipment areas, drainage systems, and seating may also require dedicated space.
Site conditions are equally important. Soil stability, groundwater levels, slope, and drainage can affect excavation methods, structural requirements, and construction costs.
A professional site assessment can identify potential challenges before work begins. This is particularly valuable for sloped properties, compact yards, and locations with difficult construction access.
Step 3: Establish a Realistic Budget
Setting a budget early helps homeowners select a design that balances their expectations with financial limitations. The initial construction estimate should cover all major components rather than focusing only on the pool structure.
Typical expenses may include:
- Design and engineering services
- Excavation and site preparation
- Structural construction and interior finishes
- Plumbing, electrical work, and filtration equipment
- Heating, lighting, and optional automation
- Decking, landscaping, fencing, and drainage
- Permits, inspections, and professional installation
It is also important to account for ongoing expenses. Electricity, water treatment, cleaning supplies, equipment servicing, and occasional repairs contribute to the total cost of ownership.
Keep a contingency allowance for unexpected site conditions or construction changes. Obtain itemized estimates from qualified contractors so you can compare costs and understand what each proposal includes.
Step 4: Choose the Right Pool Shape and Size
Pool dimensions should reflect the available property space and the activities you intend to support. Selecting a pool that is too large can reduce the usability of the surrounding yard, while an undersized design may not accommodate your household’s needs.
Common pool shapes include:
- Rectangular: Suitable for lap swimming, contemporary architecture, and straightforward layouts.
- Square: A practical option for compact gardens and relaxation-focused designs.
- Freeform: Useful for creating a softer appearance that complements natural landscaping.
- L-shaped: Can separate different activities or accommodate irregular property layouts.
- Narrow lap pool: Designed for exercise where the available space is long but relatively narrow.
Depth requires separate consideration. A pool for casual recreation may need a different configuration from one intended for specific swimming activities.
Review scaled drawings before approving the design. These plans should show the pool’s dimensions, surrounding clearances, access points, and equipment locations.
Step 5: Select Suitable Construction Materials
Material selection affects the pool’s appearance, durability, installation time, and maintenance requirements. The best option depends on the desired design, site conditions, available contractors, and long-term budget.
Concrete pools offer substantial flexibility in shape and dimensions, making them suitable for highly customized layouts. However, construction generally requires more on-site work, and the interior finish may need periodic refurbishment.
Fiberglass pools use prefabricated shells that can simplify installation when the available shapes, dimensions, and site access are suitable. Their design options are generally more limited than those of fully customized concrete pools.
Vinyl-liner pools offer another option, with different initial costs and eventual liner replacement requirements.
Compare expected service life, repair options, surface maintenance, and local installation expertise before making a final decision.
Step 6: Plan Filtration and Water Treatment
A properly designed circulation and filtration system is essential for maintaining clean, clear, and hygienic pool water. Equipment should be selected according to the pool’s water volume, expected usage, and operating conditions.
Pumps circulate water through the filtration system, while filters remove suspended particles. Appropriate sanitization and regular water testing help control microorganisms and maintain suitable chemical balance.
Discuss equipment sizing and placement with your pool contractor. Pumps, filters, valves, and treatment systems should be accessible for routine inspections and repairs.
Energy efficiency is also worth considering. Suitable pump configurations, efficient operating schedules, and properly maintained equipment can help reduce electricity consumption without compromising water quality.
Step 7: Choose Optional Features Carefully
Additional features can improve convenience and comfort, but they should support your main objectives rather than unnecessarily complicate the project.
Depending on your budget and lifestyle, you might consider:
- Underwater lighting for evening visibility and atmosphere
- Heating equipment to extend the swimming season
- Pool covers to reduce evaporation and heat loss
- Automated controls for selected equipment and lighting
- Built-in benches or shallow relaxation areas
- Water features that complement the surrounding design
Evaluate each feature in terms of installation cost, energy use, maintenance, and compatibility with the pool’s equipment.
It is often easier to provide the necessary electrical connections, plumbing, and equipment space during initial construction than to add them later.
Step 8: Integrate Landscaping and Outdoor Living Areas
A swimming pool should function as part of the property’s wider outdoor environment. Thoughtful landscaping and circulation planning can make the area more comfortable and visually cohesive.
Consider how people will move between the house, pool, patio, and outdoor dining areas. Leave sufficient room for walking, seating, and safe access to the water.
Select paving materials that provide appropriate traction when wet and can withstand local weather conditions. Plants should be chosen carefully because excessive leaf litter, invasive roots, and high-maintenance landscaping can create additional work.
Shade structures, privacy screens, and outdoor showers may also improve the experience. However, these features should be positioned without obstructing access or creating unnecessary maintenance difficulties.
Step 9: Prioritize Safety and Accessibility
Safety planning should begin before construction, not after the pool is completed. The design should include suitable entry points, secure barriers, visible depth changes, and safe walking surfaces.
Depending on local regulations and household needs, important measures may include:
- Secure fencing with compliant gates
- Slip-resistant paving around the pool
- Clearly visible steps and changes in depth
- Suitable handrails and accessible entry options
- Appropriate lighting for nighttime use
- Electrical installations that meet swimming pool safety standards
If children will use the pool, consider visibility from the house and the placement of surrounding barriers. Active adult supervision remains essential, even when safety equipment is installed.
Consult qualified professionals to ensure the design complies with applicable building codes and safety requirements.
Step 10: Confirm Permits and Local Regulations
Before excavation begins, determine which approvals are required for your property. Depending on the location, pool construction may involve building permits, electrical inspections, plumbing approvals, and specific barrier or setback requirements.
Check whether the proposed location conflicts with easements, underground utility lines, drainage routes, or property restrictions. Some residential developments may also have additional design guidelines.
Allow enough time for approvals when establishing the construction schedule. Beginning work before required permissions are secured can lead to delays, additional expenses, or requests for modifications.
Your contractor should clarify which permits and inspections are included in the agreement and which responsibilities remain with the homeowner.
Step 11: Select a Qualified Pool Contractor
The contractor you choose can significantly influence construction quality, project coordination, and long-term reliability. Compare several qualified professionals rather than making a decision based solely on the lowest quotation.
Review their experience with similar pool designs, references, insurance coverage, and relevant credentials. Ask to see examples of completed projects that demonstrate their ability to handle the type of installation you are planning.
A written contract should explain:
- The approved design and materials
- The scope of work and construction stages
- Estimated completion dates
- Payment schedules and potential additional costs
- Warranty terms and after-installation support
- Responsibility for permits, inspections, and site cleanup
Clear documentation helps reduce misunderstandings and gives both parties a shared understanding of the project.
Step 12: Prepare for Construction
Once the design, budget, approvals, and contractor agreement are finalized, prepare the site for construction. Confirm access for machinery, establish suitable storage areas, and protect nearby structures and landscaping where necessary.
Before excavation, ensure underground utilities have been identified and marked according to local procedures. Confirm the pool’s final dimensions and location against the approved plans.
Maintain communication with the contractor throughout construction. Significant changes to dimensions, materials, or equipment should be reviewed for their effect on cost, schedule, safety, and performance before approval.
Weather, site conditions, inspections, and material availability can affect the timeline, so allow reasonable flexibility in your expectations.
Step 13: Inspect and Test the Completed Pool
Before using the pool, arrange the required inspections and commissioning checks. The contractor should verify that the circulation system, filtration equipment, electrical installations, and other components operate correctly.
The finished structure, interior surface, drainage, entry points, and surrounding paving should also be checked for visible defects or incomplete work.
Ask the contractor to explain how to operate the equipment, test water chemistry, clean the pool, and recognize signs of potential problems. Keep copies of warranties, equipment manuals, maintenance schedules, and inspection records.
Do not begin swimming until the pool has been properly commissioned and the water has been confirmed suitable for use.
Step 14: Create a Long-Term Maintenance Plan
Regular maintenance protects the pool’s condition and helps prevent small issues from becoming expensive repairs. The exact routine depends on the pool type, equipment, climate, and frequency of use.
A typical maintenance plan includes:
- Testing and balancing water chemistry
- Cleaning the pool surface and removing debris
- Inspecting pumps, filters, valves, and visible plumbing
- Checking water levels and monitoring for leaks
- Cleaning or replacing filters according to manufacturer guidance
- Scheduling professional servicing when needed
Keep records of equipment maintenance and recurring problems. These records can help identify unusual operating patterns and support warranty claims if repairs become necessary.
A realistic maintenance schedule also makes it easier to estimate ongoing costs and maintain consistent water quality.
Conclusion
Planning a residential swimming pool is a multi-stage process that involves design, budgeting, site assessment, material selection, equipment planning, safety, and professional installation. Each decision influences how the pool performs and how much effort it requires to maintain.
By defining your priorities, evaluating your property, comparing qualified contractors, and preparing for long-term ownership, you can reduce avoidable complications and make better use of your investment. Careful planning helps create a swimming pool that fits your home, supports your lifestyle, and remains practical for years to come.